

End Dump Trailer Tailgate Leakage: Hinge, Latch and Seal Wear with Fine Material
Learn how to diagnose end dump trailer tailgate leakage when hauling sand and fine materials. Check hinge wear, latch alignment, seals, and repair options.

A load of dry screenings can leave the yard with the rear gate looking completely closed, then produce a thin dust line across the lower sill after the first rough section of road. In fine-material service, end dump trailer tailgate leakage usually starts with a small change in contact rather than one dramatic failure. Hinge movement, uneven latch preload, trapped particles, worn sealing surfaces, and rear-body distortion can all create a path that larger aggregate would never expose.
The most useful diagnosis begins before any adjustment is made. A narrow trail below one corner tells a different story from material spread across the full rear opening. Likewise, leakage visible while the trailer is still parked deserves a different investigation from leakage that appears only after vibration and site travel.
That distinction matters during sand, crushed-fines, soil, quarry-screenings, and similar bulk work. Fine particles can migrate through very small openings, while moisture may temporarily pack the same opening and hide the problem for another trip.
Therefore, the inspection should follow the mechanical path of the gate: first identify where material escapes, then expose the contact surfaces, check how the hinges guide the gate, watch how the latches apply pressure, and finally confirm that the rear body opening still allows an even closure.
The useful distinction is simple
A latch should hold an already aligned gate closed. It should not pull a worn or distorted gate into position and become the only reason the rear opening appears sealed.
Where Fine-Material Leakage Starts
A rear gate does not need a visually dramatic opening to lose dry sand or screenings. During transport, vibration keeps fine particles moving against the lowest available escape path. A slight loss of contact can therefore become visible long before the gate looks obviously damaged.
Location provides the first useful clue. A continuous dust line along the lower sill suggests broad contact loss. By contrast, a small pile below one corner points toward a local alignment, seal, hinge, or trapped-particle problem.
Read the material trail before cleaning it away
Imagine a trailer returning from a quarry route. The rear body is dusty, but most of the gate remains clean. Only the lower right corner carries a fresh stream of pale screenings. That pattern is useful evidence because the leak is concentrated rather than uniform.
Another trailer may show a light horizontal line almost across the entire rear sill. In that case, one isolated seal defect becomes less likely. Broad loss of latch pressure, sill condition, contamination, or gate geometry deserves more attention.
One lower corner leaks first
Check corner height, hinge movement, local seal contact, trapped material, and whether one latch is carrying more closing work.
A thin line appears across most of the sill
Look for broad loss of contact, contamination, uneven preload, or rear-sill geometry rather than treating one corner in isolation.
The gate stays clean while parked but leaks after site travel
Vibration, body movement, hinge looseness, or inconsistent latch retention may be exposing a marginal contact condition.
Dust appears before visible material loss
Treat the powder line as an early warning. Fine dust often identifies an opening before enough material escapes to form a noticeable pile.
Material condition belongs in the diagnosis
“Aggregate” is often too broad a description. Dry quarry screenings, washed sand, crushed fines, damp soil, and mixed stone with a high fines content behave differently around a rear gate.
Moisture matters as well. Damp material may temporarily bridge a narrow opening. Later, the same residue can dry into a hard deposit that prevents the gate from seating fully.
A useful first record therefore includes material type, approximate fineness, moisture condition, exact leakage position, and the stage of the trip when the first trail appears. That short record often prevents unnecessary adjustment later.
Clean the Tailgate Area Before Diagnosing
Before inspecting or cycling the tailgate, park on firm, level ground, secure the trailer against movement, and keep personnel clear of the gate’s swing path and pinch points. Inspect with the body empty and lowered wherever possible. If a raised body or open gate must be supported, follow the manufacturer’s approved support and restraint procedures; never rely on hydraulic pressure alone.
A dirty rear gate can hide wear, but contamination can also create the leak itself. Fine material frequently remains on the lower sill, gathers inside corners, or packs around sealing edges after discharge.
Once the body returns to transport position, that residue can act like a thin shim. The latch still reaches its closed position, yet part of the gate remains slightly away from the intended seating surface.
Photograph first, then expose the contact surfaces
Before cleaning, the residue pattern deserves a few clear photographs. A polished contact strip beside a heavily packed strip can reveal where the gate has been carrying pressure and where material has repeatedly collected.
After documentation, remove loose fines from the lower sill, side edges, hinge recesses, latch contact areas, and accessible seal channels. The aim is to reveal the actual metal and sealing surfaces without damaging flexible material.
- Clear compacted sand, mud, screenings, and small stones from the rear interface.
- Check for fines trapped behind seal strips or retaining sections.
- Look for rust scale, burrs, raised weld areas, dents, or sharp edges.
- Compare shiny witness marks with sections showing little or no contact.
- Cycle the empty gate several times and compare the final position.
Repeated cycling is important. One clean closure can hide an intermittent problem. If the lower corner lands differently on the second or third cycle, the next inspection should focus on movement rather than immediately replacing a seal.
Cleaning may remove the leak without removing the cause
Suppose cleaning removes a compacted ridge from one lower corner and the gate seals again. The immediate symptom is gone, but the inspection is not finished. The same corner may contain a worn recess, damaged retainer, or contact pattern that repeatedly traps material.
Therefore, a successful cleaning result should be followed by another question: why did residue collect in that exact position? That answer determines whether the next trip remains clean or simply starts the same cycle again.
Check Hinge Wear and Gate Alignment
Tailgate hinges control the path the gate follows during opening and closing. Consequently, hinge wear affects much more than how smoothly the gate swings. It also changes where the gate arrives when the latch begins applying pressure.
Small movement near the hinge can become more obvious at the opposite edge. A worn pin or bushing may therefore create a visible lower-corner gap even when the hinge itself does not look severely damaged from several steps away.
Watch the gate before latch force changes its position
The natural closed position is valuable evidence. During an empty cycle, observe whether the gate arrives squarely against the rear body before full latch engagement. A corner that sits high or sideways at this stage should not be dismissed simply because the latch can pull it tighter.
Compare both hinge areas while the gate begins moving. Vertical free movement, sideways movement, changing pin position, uneven hinge spacing, or one side beginning rotation before the other can all change the final contact pattern.

Wear patterns often explain more than appearance
Fresh fretting marks, displaced bushings, elongated mounting holes, or uneven pin contact can show where movement is developing. Meanwhile, a gate sitting lower on one side may indicate that hinge condition is already changing the sealing relationship.
Another useful observation happens when the latch releases. If one corner jumps noticeably outward or upward as preload disappears, the latch may have been pulling the gate into position instead of simply retaining it.
That difference matters because repeated corrective force can move the symptom around. One side becomes heavily loaded, another loses contact, and a replacement seal starts wearing unevenly.
Visible structural cracks, torn welds, badly displaced hinge brackets, or rapidly increasing movement should move the issue beyond routine adjustment. Applicable maintenance procedures and qualified technical assessment should control the next step.
Inspect Latch Preload and Closing Consistency
Latch preload is the force that keeps the closed gate against its seating surfaces. Too little pressure can leave a fine-material escape path. However, increasing pressure is not automatically the correct repair.
Excessive adjustment can hide hinge wear, pull a gate sideways, overload linkage points, or compress one section of seal far more heavily than another. The useful question is therefore not simply whether the latch closes, but what happens to the gate while it closes.
Compare left and right engagement
When one latch reaches its keeper noticeably earlier, the final part of the closing cycle can twist the gate. A latch that repeatedly needs much more effort on one side may also be reacting to gate geometry rather than an isolated adjustment issue.
Contact marks deserve attention here. A hook touching only one keeper edge, a deep localized wear groove, a loose linkage pin, or an elongated hole can change how closing force reaches the rear gate.
Before changing the latch setting, confirm these points
- The hinges do not show abnormal free movement.
- The gate returns to a repeatable position over several empty cycles.
- The sill and contact surfaces are clean.
- Latch hooks, keepers, pins, and brackets remain mechanically sound.
- The latch is not visibly dragging the gate sideways into place.
Generic adjustment turns or universal preload values do not belong in this diagnosis. Rear-gate mechanisms differ, and specific settings should follow verified technical information for the actual hardware.
Still, repeatability is easy to judge without inventing a number. Close the empty gate several times. The final position, left-to-right engagement, and visible contact pattern should remain consistent.
If one closure looks correct and the next leaves a different corner gap, adjustment should pause. Hinge movement, contamination, linkage looseness, or rear-body geometry may be changing the result from cycle to cycle.
Examine Sealing Surfaces and Trapped Particles
Once the gate reaches a stable position and the latch behaves consistently, the actual sealing path becomes easier to judge. Some tailgates rely mainly on close metal contact, while others use flexible sealing elements or retained strips.
Regardless of the arrangement, fine material needs only one interrupted section. A worn lower lip, damaged seal end, dent, burr, hard deposit, or trapped stone can create a route that grows more visible as vibration continues.
Lower corners deserve more attention than their size suggests
Gravity keeps much of the cargo against the lower area of the gate. Consequently, a narrow opening at one bottom corner may lose more material than a larger opening higher on the rear frame.
The transition between horizontal and vertical contact surfaces is particularly important. A seal may look healthy across most of the lower edge while a short corner section has folded, hardened, shifted, or lost compression.
- Cuts, tears, missing sections, or permanent flattening in flexible sealing material.
- Loose or distorted retainers that allow the sealing element to move.
- Packed fines behind a seal or inside a corner transition.
- Rust scale, dents, worn edges, or raised damage on mating surfaces.
- Heavy compression in one area beside a section showing very little contact.
The visible leak may not sit directly beside the obstruction
One small stone caught on the sill can hold the gate away from the frame. Fine particles may then escape several centimeters from that stone, making the leakage trail appear unrelated to the obstruction.
This is why the complete lower contact line should be cleaned and inspected rather than focusing only on the point where material reaches the road surface.
Seal age alone is also a weak diagnosis. A relatively new seal can leak if gate alignment is poor. Meanwhile, an older sealing element may continue working when pressure remains even and the mating surfaces stay in good condition.
Where unusual industrial material may affect seal compatibility, cargo requirements, local regulations, site procedures, and qualified technical advice should control material selection. Compatibility should not be assumed from appearance alone.
Confirm Body Distortion Is Not Preventing Closure
A serviceable seal cannot compensate for a rear opening that no longer meets the gate evenly. Therefore, recurring leakage after cleaning and reasonable latch work should expand the inspection beyond the latch itself.
Dump bodies operate through repeated loading, road vibration, material impact, discharge cycles, and site movement. Local damage or accumulated structural change can alter the relationship between the sill, rear posts, hinges, and latch supports.
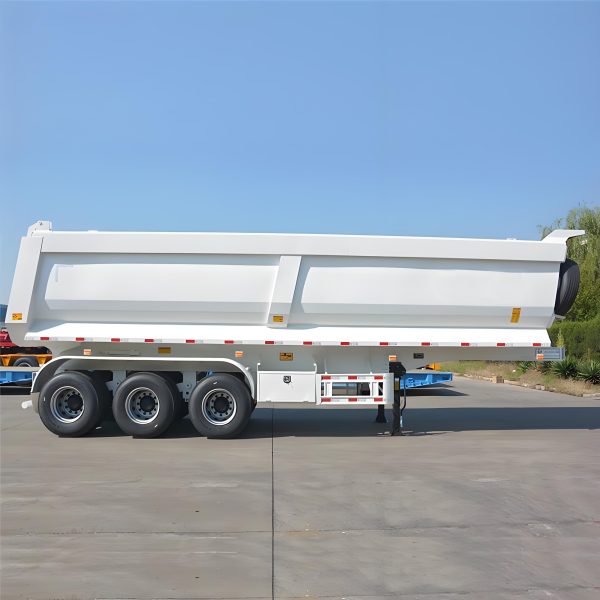
Check geometry on a suitable surface
A trailer standing across deep ruts or an uneven quarry pad can temporarily twist enough to change gate contact. As a result, permanent adjustment based only on that position can create a poor fit once the trailer returns to more level ground.
A controlled comparison is more useful. Observe the empty rear gate on suitable ground, then compare the condition that produced the leak. A gap that changes significantly with trailer attitude points toward a different issue from a fixed local defect.
Previous damage and repair history can shorten the search
A loader bucket, large stone, or site obstacle can damage a rear sill or post without preventing the gate from opening. The trailer remains operational, yet the seating geometry has changed enough for fine material to find a path.
Recent hinge repairs, latch-bracket welding, rear-sill work, or an impact near the gate should therefore be compared with the date and location of the first leakage.
Stop treating the problem as adjustment-only when:
- A structural crack or torn weld is visible.
- A hinge or latch support is visibly bent or displaced.
- Gate position changes rapidly between service cycles.
- Increasing latch force is repeatedly required to reach the same position.
- The gate no longer closes or retains consistently.
Repair Decision and Post-Service Leakage Check
Material outside the gate proves that retention has failed, but it does not identify the failed component. A useful repair decision connects the leakage pattern with the gate movement and contact evidence already collected.
Cleaning may be sufficient when residue alone prevented complete seating and the gate remains mechanically stable. Latch correction may be appropriate when alignment stays repeatable but closing preload has changed.
By contrast, a gate that shifts during closure points toward hinge or alignment work. Visible sealing damage supports seal service only after the surrounding metal contact surfaces and gate position have also been checked.
Leak disappears after cleaning
Confirm several repeatable gate cycles and identify why the contamination collected in that location.
Gate moves noticeably when latch pressure releases
Inspect hinge movement and natural gate position before increasing preload again.
A replacement seal leaks at the same point
Recheck gate alignment, the mating surface, local sill condition, and compression distribution.
Visible structural damage or unstable alignment
Move beyond routine adjustment and arrange qualified structural assessment under the applicable maintenance procedure.
Retest empty before adding fine material
After service, cycle the gate several times while empty. The closing position should repeat without an unusual impact, abrupt sideways movement, or noticeably different left-to-right latch behavior.
Next, inspect the same contact areas that originally leaked. Fresh witness marks should make mechanical sense, and no single corner should rely on obviously heavier compression to remain closed.
Only after confirming reliable gate closure and latch retention should a controlled loaded check be considered under applicable site procedures. Inspect the rear gate after loading but before road travel. If material leaks or the gate cannot be securely retained, stop and correct the condition before road travel. Otherwise, the next planned inspection after initial movement can help distinguish static leakage from movement-related leakage.
When a new material trail appears, record its first location before cleaning. A repair may have improved the original weak point while exposing another section with lower contact pressure.
Keep the service record specific
“Tailgate repaired” provides little value when the same symptom returns several weeks later. A more useful record states whether work involved cleaning, hinge components, latch position, linkage parts, sealing material, rear-sill repair, or body alignment.
Consistent photographs make that history easier to interpret. Repeating the same full rear view, both lower corners, hinge areas, and latch contact points creates a visual record of changing wear.
For regular bulk-material operations, the wider BOCA dump semi trailer range provides relevant product context when material condition, tailgate arrangement, body structure, and operating environment need to be discussed together.
Fine-Material Service
Tailgate condition should match the material actually being transported
Sand, screenings, crushed fines, dry soil, and mixed aggregate can expose rear-gate contact problems earlier than coarse material. A configuration discussion is therefore more useful when it includes material fineness, moisture, route surface, unloading conditions, and the required rear-gate arrangement.
BOCA’s dump trailer category includes end- and rear-discharge configurations for loose bulk material applications. Final tailgate details should still be confirmed against the actual operating requirement rather than inferred from a general trailer image.
View Dump Semi TrailersFAQ
Treat the material trail as evidence, not the diagnosis
A reliable rear-gate check moves from the visible symptom toward the mechanical cause. Leakage location comes first. Cleaning exposes the contact path. Hinge movement shows how the gate arrives, while latch behavior reveals how closing pressure develops.
Seal condition then shows whether that pressure remains continuous. Finally, rear-body geometry explains recurring leaks that survive otherwise reasonable maintenance.
- Record material fineness, moisture, and the first visible leakage position before cleaning.
- Capture the full rear gate, both hinge areas, both latch points, lower sill, and seal contact surfaces.
- Record one complete opening-and-closing cycle before changing latch position or replacing parts.
Tailgate Condition Review
Send the Details That Show How the Rear Gate Is Actually Closing
Useful technical information includes material type and fineness, moisture condition, exact leakage position, full rear-gate photographs, hinge condition, latch contact points, seal condition, and recent repair history.
A short video covering the complete opening and closing cycle can add important context. Sideways gate movement, unequal latch engagement, or a corner that changes position under preload may be difficult to explain with still photographs alone.
Those records provide a stronger basis for discussing maintenance direction or a suitable rear-gate configuration. Most importantly, recurring end dump trailer tailgate leakage should be traced to the actual contact path before repeated latch tightening becomes routine.
Submit Tailgate and Material Details