

Fuel Tanker Trailer Hose and Coupling Wear: How to Prevent Loading and Unloading Leaks

A field-focused look at hose bodies, end fittings, coupling faces, seals and connection strain—and how wear patterns can reveal the real cause of loading or unloading leaks.
A transfer line can look dry during setup and begin seeping only after flow starts. Fuel tanker hose and coupling wear may already have created a weak point around the hose body, end fitting, seal or mating face.
The useful question is not simply whether the connection looks acceptable. The location and pattern of wear can help distinguish between hose damage, sealing problems, connection strain and a recurring trailer-to-site layout issue.
Look for abrasion, kinks, flattening, swelling, soft spots and changes near the fittings.
Check mating faces, seals, locking parts, caps and unexpected movement before engagement.
Confirm that the connected hose is not stretched, twisted, crushed or pulled sideways.
Where Hose and Coupling Leaks Begin
A transfer leak may first appear as a damp coupling face, a stained section behind an end fitting or a small amount of product appearing after the hose shifts under flow rather than as an obvious hose rupture.
That matters because the leak location narrows the troubleshooting path. Seepage directly between two coupling faces suggests a different problem from wetness behind the fitting. Likewise, a localized damp patch on the hose body points toward another type of damage.
The connection is best viewed as a system. A fuel tanker trailer may combine fixed pipework, outlet valves, hose assemblies, couplings and receiving-point connections, and the condition or position of one part can affect the next.
For example, a receiving point positioned too far away can leave the hose under continuous tension. The end fitting then carries additional weight while the coupling sees a sideways load. Once transfer begins, hose movement or vibration can make a marginal condition visible as seepage.
Contamination can create another leak pathway. Sand, rust, dried residue or damaged surface material can prevent the sealing faces from sitting evenly. A coupling may therefore feel mechanically secure without forming an even seal around its full circumference.
If seepage returns after cleaning, reconnecting or replacing a seal, the mating faces, locking geometry, end fittings, hose route and receiving connection deserve a wider review.
What to Look For Before Transfer
A useful check starts before the hose is connected. Enough working length should be visible to examine the hose body without forcing it into a tight bend, and adequate lighting helps reveal shallow cuts, embedded debris and small changes in shape.
The hose can then be viewed from one end to the other. Cuts, deep scuffing, flattened areas, cracking, blisters, exposed reinforcement and unusual staining all deserve attention. The areas immediately behind both end fittings are particularly useful to compare because repeated bending often concentrates there.
When site procedures allow, touch can reveal local softening, unusual hardness, raised areas or flattening that may be less obvious visually. Any tactile inspection should only be carried out on an isolated and safe assembly.
Coupling faces and seals also need to be visible before mating. Dirt can hide scratches, gasket damage or uneven surfaces, while a damaged joint can sometimes feel secure simply because the locking mechanism has engaged.
A Consistent Inspection Order Helps Reveal Changes
- Confirm the hose identity and intended service.
- View the full hose body for visible damage or shape changes.
- Compare both end fittings for movement, dents or corrosion.
- Examine mating faces, seals and locking parts.
- Connect without forcing a damaged or misaligned joint.
- Look at the hose route again in its actual working position.
Recent operating history provides useful context. A hose that has been crushed, sharply pulled, dropped or involved in an earlier leak deserves closer attention than one with a stable and traceable service history.
The hose specification also matters when condition becomes questionable. Rated working pressure, manufacturer bend limits, coupling type, seal compatibility and approved service medium should come from the actual hose and connection documentation rather than visual estimates.
Exposed reinforcement, severe kinking, obvious swelling, fitting movement or damaged locking hardware are all reasons to keep the assembly out of routine use until the condition has been assessed against the applicable manufacturer, facility and local requirements.
What Different Wear Patterns Can Indicate
Fuel transfer hose wear often reflects the way the hose is handled, stored and routed. A long scuff along one side may correspond with repeated contact against a curb, trailer edge or hose tray, while damage concentrated beside an end fitting can point toward repeated bending at the same location.
Abrasion is more useful when viewed by depth and progression rather than by appearance alone. Light cover marks are different from wear that threatens the hose structure, so replacement decisions should follow the hose manufacturer’s acceptance criteria.
Kinks create a different pattern. A sharply folded section concentrates stress through a short part of the hose, and the external shape may not reveal the full condition after the hose has straightened again.
Flattening or crushing may result from equipment, wheels or heavy stored material. Although the external shape can partly recover, that does not confirm that the internal structure has returned to its original condition.
Swelling, blisters and local soft spots also deserve investigation because they can be associated with internal deterioration or material incompatibility. The cause should be confirmed against the actual hose construction, transferred product and service history rather than guessed from surface appearance.
Why the Area Beside the End Fitting Matters
The hose-to-fitting transition combines a flexible hose with a rigid component. If the working route repeatedly uses that transition as a hinge, the same short section can experience concentrated bending over many loading or unloading cycles.
Unexpected fitting rotation is another warning sign. Visible separation, ferrule distortion or a changing relationship between the hose and fitting requires technical review. The same applies to impact damage on the metal fitting itself.
Corrosion needs context as well. Surface discoloration is different from pitting or material loss that could affect the connection geometry or component strength.
| Observed condition | What it may point to | Useful next step |
|---|---|---|
| Repeated scuff in one location | Fixed routing or storage contact | Inspect the hose and identify the contact point |
| Sharp bend behind fitting | Concentrated flexing and connection load | Review the route and the affected hose end |
| Local swelling or softening | Possible deterioration or compatibility issue | Hold for qualified assessment |
| Fitting movement or separation | Possible loss of secure attachment | Remove from routine service pending review |
Why a Coupling Can Leak Even When It Looks Secure
Coupling leakage often gets blamed on the gasket first, but sealing depends on the complete mechanical interface. Clean mating faces, compatible components, correct alignment and even engagement all influence the result.
Scratches, dents, corrosion, embedded grit and hardened residue can affect the mating surfaces. The seal itself may show cuts, flattening, swelling, hardening, distortion or incorrect seating.
Seal material also needs to match the approved specification for the actual fuel, additives, cleaning products, temperature range and connection system. A replacement gasket that fits physically is not automatically correct for the service.
Locking arms, lugs, threads and retaining parts should engage normally. Unusual resistance does not prove a tighter seal; it may instead indicate dirt, deformation, misalignment or damaged hardware.
Mechanical Locking and Fluid Sealing Are Different
A latch can reach its closed position while the gasket remains pinched or unevenly compressed. One side of the joint can also remain slightly misaligned if hose weight or side pull is acting across the connection.
Small particles can create the same problem by preventing the faces from sitting evenly. The gap may be difficult to see until product flow begins.
Protective caps affect the next transfer as well. A dirty cap can re-contaminate a cleaned coupling face, while an uncapped connection remains more exposed to impact and debris during storage and transport.
If the same coupling leaks again after a seal has been replaced, the investigation should move beyond the gasket. The mating connection, hose fitting, locking geometry, side load and receiving-point condition may all contribute.
Hose Routing Can Be Part of the Leak Problem
A hose can appear acceptable before connection and begin showing problems only in its working position. If the receiving point is too far from the trailer, the hose may reach only when stretched tightly across the ground.
That creates several loads at once. The hose cover may rub against the surface, the end fitting carries extra leverage, and the coupling can remain under continuous sideways force.
A better route allows the hose to reach the connection naturally without depending on severe tension, sharp bending or stored torsion. Minimum bend limits should come from the hose manufacturer rather than a visual estimate.
Vehicle position matters too. Parking too far away can pull the line close to its full working reach, while positioning too close can create tight loops, extra ground contact or interference with nearby equipment.
The Route May Change Once Flow Begins
During startup, a hose may stiffen, settle, pulse or shift toward a nearby edge. A route that appeared acceptable while static can therefore behave differently after product starts moving.
Growing tension, repeated rubbing or visible connection movement are more useful clues than simply checking whether the hose still reaches the receiving point.
Twisting deserves separate attention. If the coupling is rotated while the hose cannot turn freely, torsion can remain stored in the assembly and add repeated stress near the fitting.
When the same routing issue returns at one site, the problem may involve more than the hose itself. Outlet position, working distance, hose storage and receiving-point geometry can all influence the same wear pattern.
Trailer-Side Context
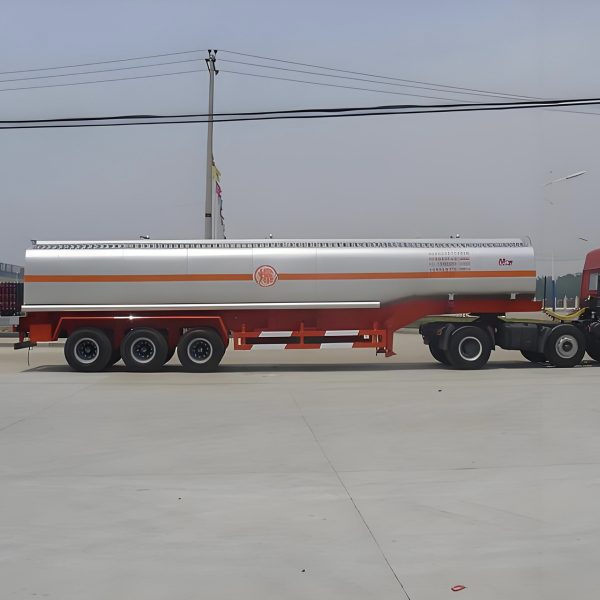
Review the Working Layout, Not Only the HoseThe tank semi-trailer range provides relevant context when outlet position, hose reach and transfer-side layout need to be considered together.

When a Leak Means the Transfer Should Not Continue
A general guide cannot replace the emergency procedure for a specific terminal, fleet or loading site, but visible leakage should not be treated as a condition to work around.
If leakage is present before transfer, product movement should not begin until the condition has been resolved. Visible structural damage, uncertain coupling engagement or a seal that cannot sit correctly are also reasons to hold the connection.
If leakage appears after transfer starts, the operation should be stopped through the established site and equipment procedure. Isolation, notification and spill response then follow the applicable facility plan and local requirements.
A pressurized or product-filled joint should not be subjected to improvised tightening, striking, repositioning or disconnection outside approved procedures. Once safe, the exact leak location and surrounding condition are valuable clues for finding the cause.
The Leak Pattern Can Preserve Useful Evidence
When safe and permitted, wide photographs can show the complete hose route, trailer position and receiving connection, while closer images can document the coupling face, end fitting and exact leak point.
The timing of the leak matters too. Seepage that appears immediately after startup can point toward a different condition from leakage that begins only after the hose has moved or remained under load for a period.
If the same symptom returns after one component has been replaced, the hose, coupling, receiving connection, routing and fixed pipework are better reviewed together than treated as unrelated parts.
Wear History Can Reveal Problems a Single Inspection Misses
A single visual inspection shows the condition at one moment. A traceable history can show whether a scuff is stable, whether a fitting has moved over time or whether the same leak keeps returning at one terminal.
Each hose assembly benefits from a practical identifier linked to its specification, coupling type, approved service medium and recent maintenance history. Condition notes are most useful when they describe what was actually found rather than recording only “OK.”
For example, “surface abrasion near outlet end; no exposed reinforcement” creates a baseline that can be compared later. A note such as “hose replaced” records the action but does not explain why the wear occurred.
Leak records are more valuable when they include the connection point, stage of transfer, visible leak location and hose route. If a problem appears repeatedly at one facility but not another, site geometry becomes a more relevant part of the investigation.
Inspection frequency should reflect manufacturer guidance, site procedures, service intensity, damage history and applicable local requirements. Events such as crushing, impact, abnormal pull or leakage may also justify assessment before the next routine interval.
- Hose, coupling and seal identification
- Transferred medium and service duty
- Photographs of the wear and complete hose route
- Leak point and stage of transfer
- Previous repair or replacement history
- Confirmed or unresolved cause
Repeated Wear May Point to the Transfer Configuration
Repeated damage usually deserves more than another component change. A hose may be too short for the regular working distance, the storage arrangement may create the same abrasion point, or the outlet and receiving connection may force the hose into the same bend during every unloading cycle.
A useful configuration review starts with the actual transported medium and approved hose specification, then considers coupling and seal requirements, normal working distance, outlet position, hose storage and transfer frequency.
Wide photographs are particularly useful because they show trailer position, vertical offset, hose reach and ground contact together. Close views can then document the exact wear point or damaged connection.
Where several loading or unloading locations are used, each layout deserves separate consideration. A trailer may operate without leakage at one site and experience recurring strain at another because the connection geometry changes.
Local compliance requirements belong in the same review. Fuel-transfer rules, hazardous-area controls and equipment acceptance requirements vary by jurisdiction and facility, so final component and configuration decisions should follow the applicable requirements and qualified technical approval.
For trailer-side planning, the BOCA fuel tanker trailer configurations can be reviewed against the actual medium, connection specification, normal working distance, transfer frequency and site layout rather than a generic parts list.
Related BOCA Resources
These pages provide additional trailer and configuration context without changing the maintenance focus of this guide.
FAQ
Why can a fuel tanker coupling leak even when it appears locked?
Mechanical engagement does not guarantee an even fluid seal. The gasket may be cut, twisted, contaminated or unevenly compressed, while damaged mating faces can create another leak path.
Hose weight or sideways pull can also affect alignment, which is why the coupling condition and working hose route should be considered together.
How should fuel transfer hose inspection frequency be determined?
Inspection frequency should reflect the hose manufacturer’s guidance, applicable regulations, facility procedures, service intensity and the assembly’s damage history.
Impact, crushing, abnormal pull or a previous leak can also justify assessment before the next routine interval.
What information is most useful when an unloading leak keeps returning?
Useful information includes the hose and coupling specification, seal details, transferred medium, previous maintenance and the exact point and stage at which leakage appears.
Wide photographs of the complete hose route and receiving-point layout are especially useful when the same problem may be related to working distance or site geometry.
From Wear Pattern to the Next Decision
Hose cover condition matters, but seals, fittings, coupling faces, locking parts, routing and service history can be equally important when tracing a transfer leak.
Repeated fuel tanker hose and coupling wear is particularly useful because the pattern can point beyond the damaged part itself. Storage contact, working distance, connection alignment or site geometry may be creating the same condition again.
Before changing the trailer-side arrangement, it is useful to compare the transported medium, hose and coupling specification, normal loading or unloading distance, outlet position, transfer frequency and photographs of the actual site. Those details make it easier to distinguish a component problem from a configuration problem.
For a trailer-side configuration review, prepare the transported medium, hose and coupling specification, normal working distance, wear photographs, loading or unloading layout, use frequency and destination-country requirements.
This provides a clearer basis for reviewing outlet position, hose reach and the working arrangement against the real operating condition.
Discuss Your Tanker Transfer Layout