

How to Avoid Buying Mistakes with Open-Deck Flatbed Semi-Trailers

Open-deck hauling looks easy until a flatbed semi trailer arrives and the work still feels difficult. Loads take longer to tie down. Axle weights drift outside the expected range. Small parts start wearing early. These issues rarely come from a single “bad component.” More often, they come from missing details in the spec, the inspection plan, and the way the trailer matches real routes. This guide turns that into a repeatable workflow: a one-page Cargo & Route Brief, a spec template you can paste into an RFQ/contract appendix, and a yard-friendly PDI checklist for delivery day.
This section breaks down deck length choices by real dispatch patterns: tight sites, mixed industrial work, and long light freight.
Why open-deck platforms stay popular in global transport
An open deck is flexible by design. Side loading, top loading, and rear loading all stay possible. That flexibility is valuable for steel, timber, pipes, pallets, machinery, and mixed project cargo. A crane can place irregular loads. Forklifts can approach from both sides. Ramps can support rolling equipment.
Another advantage is planning speed. Enclosed trailers require dimension certainty and door clearance. Open decks reduce those limitations. In practice, dispatch teams often prefer a platform trailer when cargo changes shape week to week.
Operational efficiency also benefits from a simple structure. A strong main beam, reliable suspension, and well-planned securement points can support long service life. That service life depends on details, though. Details belong in the spec, not only in a brochure.
If you maintain multiple specs across markets, keep a single reference page for common deck and axle configurations so the RFQ stays consistent across teams.
Step 1: Write the “real work” on one page
A trailer spec becomes easier once the work is written down. Without a short brief, decisions drift toward popular sizes and generic options. With a brief, trade-offs become clear and measurable.
Ports punish wiring, twist lock mounts, and landing gear. Rough roads punish bushings, spring seats, and weld transitions. Long grades punish brakes, tires, wheel-end seals, and heat management. A brief should capture those pressures in plain language.
Copy-ready Cargo & Route Brief (one page)
A) Cargo profile
- Cargo families (top 3): steel / timber / coils / machinery / pallets / containers / mixed
- Typical unit size (L×W×H): ______
- Typical unit weight: ______
- Typical total cargo per trip: ______
- Weight shape: uniform / front-heavy / rear-heavy / point loads
- Center of gravity risk: low / medium / high
- Surface sensitivity: painted / machined / fragile edges / none
- Restraint style: chains / straps / mixed
- Restraint rating target: define minimum rated points (if known)
B) Loading and unloading
- Loading tools: forklift / crane / reach stacker / ramps / mixed
- Loading direction: side / top / rear / mixed
- Site conditions: tight turns / uneven ground / soft ground / debris / clean pavement
- Common delay causes: re-positioning / missing anchors / cover removal / queue time
C) Route and compliance
- Route type: highway / mixed / off-road segments
- Road surface: smooth / patched / rough / unpaved
- Grades: flat / moderate / steep
- Climate exposure: coastal salt / heavy rain / desert dust / mixed
- Enforcement pattern: low / medium / strict
- Recurring constraints: bridge limits / axle load / overall length / overall height
D) Tractor interface
- Fifth wheel height range: ______ to ______
- Kingpin size: 2″ / 3.5″
- Brake interface: ABS/EBS needs (if required)
- Electrical: plug type and voltage as required
E) Success metrics
- Target service interval: brakes / tires / bushings
- Corrosion control target: coating system + thickness target
- Target tare weight (if needed): ______
- Downtime tolerance per quarter: ______
This one page becomes a decision anchor. It also helps keep discussions consistent across engineering, operations, and service teams.
Step 2: The 10 most expensive mistakes (ranked) — and how to prevent each
These mistakes look small at first. Over time, they often become expensive. Each item includes a field check and a simple way to write the requirement into the spec.
1) Confusing rated payload with route-legal payload
A frame can be strong while the route still rejects the load. Enforcement usually cares about axle group weights, spacing, and distribution. Weight distribution is often the real reason a load fails.
How to check
- Use the heaviest recurring cargo weight from the brief.
- Require a load distribution sketch showing kingpin vs axle group weights at that load.
- Confirm that cargo placement ranges are realistic on the deck.
Write it into the spec
- “Axle-load distribution diagram required for target cargo weights and typical cargo positions.”
2) Underestimating point loads that damage decks and start cracks
Machinery feet, steel bundles, and coil cradles concentrate load into small areas. A deck can appear fine on delivery day. Repeated flex later invites fatigue near crossmembers and weld toes.
How to check
- Identify the smallest contact patch of the heaviest unit.
- Require crossmember spacing and local reinforcement zones under point loads.
- Ask how wear plates or deck protection are handled.
Write it into the spec
- “Crossmember spacing ______ mm maximum; reinforced deck zones under point loads; wear plates where required.”
3) Buying a deck length that “almost” fits the frequent job
A deck that is slightly short creates repeated re-positioning. Overhang workarounds can also introduce compliance and safety friction. Time loss is often the hidden cost.
How to check
- Rank cargo lengths by frequency, not only by maximum.
- Confirm usable deck length after toolboxes, headboard, and front structures.
- Confirm clearance needs for loading tools.
Write it into the spec
- “Clear usable deck length ______ mm minimum, excluding accessories and front structures.”
4) Choosing an axle plan by habit instead of density and route pressure
Two axles can work well for the right cycle. The same configuration can struggle with dense cargo and strict corridors. Extra axles can improve distribution, but they add weight and service complexity.
How to check
- Separate dense cargo cycles from bulky cargo cycles.
- Require axle rating, hub standard, and brake details.
- Require a load distribution sketch with typical cargo positions.
Write it into the spec
- “Axle plan selected based on cargo density and enforcement pattern; distribution sketch required.”
5) Treating securement hardware as “accessory”
Anchor layout controls productivity. If tie-down points are awkward, loading slows and restraint angles worsen. Repeated strap damage is often a symptom of layout problems, not strap problems.
How to check
- Map typical cargo shapes and tie-down directions.
- Require anchor ratings and reinforcement details behind anchor points.
- Confirm rub rails and pockets do not block access.
Write it into the spec
- “Rated tie-down points with reinforcement; anchor layout drawing approved before production.”
6) Ordering tractor compatibility late
Fifth wheel height, kingpin setting, and neck geometry affect approach angle and clearance. Mismatch can also worsen axle loading, especially with concentrated cargo. Yard coupling reliability depends on these details.
How to check
- Confirm tractor fifth wheel height range.
- Confirm landing gear rating and mounting reinforcement.
- Confirm kingpin size and height.
Write it into the spec
- “Neck geometry compatible with tractor fifth wheel height ______ to ______; landing gear rating ______T with reinforced mounts.”
7) Accepting vague welding claims without evidence
Weld quality depends on joint design, preparation, heat input, and inspection. High-stress zones include the kingpin area, suspension hangers, and rear frame transitions. Sharp toes and undercut can shorten service life.
How to check
- Require close-up photos of critical weld zones.
- Require reinforcement details at hangers and kingpin area.
- Require a basic inspection list for key joints.
Write it into the spec
- “Critical weld zones documented by photos; reinforcement plates listed by thickness and location.”
8) Under-specifying brake and heat management for steep routes
Heat issues show up as brake fade, drum cracking, hot hubs, and tires that wear faster than expected. Drum and disc options each fit different duty cycles. Service environment also matters.
How to check
- Confirm grade severity and stop frequency.
- Specify brake chamber size and slack adjuster standard.
- Add routing rules for air lines near heat zones.
Write it into the spec
- “Brake system specified for grade duty; hose routing protected from heat and abrasion; ABS/EBS requirement stated if applicable.”
9) Ignoring wheel-end details (seals, lubrication, endplay)
Wheel-end failures can be disruptive and costly. Seals, bearings, lubrication method, and endplay checks determine whether long runs remain stable. Parts availability for seals and bearings should be planned early.
How to check
- Require hub standard, bearing type, seal type, and lubrication method.
- Confirm parts availability in the target region.
- Require endplay verification on delivery.
Write it into the spec
- “Wheel-end lubrication method stated; seal type stated; endplay verification included in PDI.”
10) Skipping an objective delivery inspection standard
Small issues can become big failures. A rubbing air hose, a poorly supported harness, or weak clamp spacing can lead to roadside stops. A structured PDI catches these early.
How to check
- Use a checklist with pass/fail criteria and photos.
- Verify dimensions and options against the approved drawing.
- Require torque marks on critical fasteners.
Write it into the spec
- “PDI checklist with photos required; dimensional report required; acceptance criteria defined.”
Two short field stories that explain why “small details” matter
A long platform was once selected to reduce trip count for light construction materials. Dispatch later shifted toward dense steel bundles more often than expected. The frame handled the load, yet axle weights drifted outside the intended distribution on strict corridors. Cargo had to be moved repeatedly on the deck to stay within acceptable ranges. Tie-down angles were also poor in the practical loading zones. The fix was not “stronger steel.” The fix was an axle-load distribution plan, a revised axle layout, and an anchor layout designed for the dense cycle.
Another operation used a platform mostly in port yards. The trailer arrived with clean paint and correct dimensions. During inspection, an air line touched a sharp edge at full suspension travel. A rear harness also lacked enough clips and sagged near a crossmember corner. Both issues were invisible at rest. After two weeks, light faults and air leakage began. A simple reroute, abrasion sleeve, and tighter clamp spacing would have prevented the downtime. That lesson is why routing rules belong in the spec and the PDI.
Step 3: Choose deck length and layout with simple, repeatable logic
Length choices should reduce exceptions. A “standard rhythm” deck handles most trips. A “special tool” deck handles outliers. This strategy keeps planning predictable.
For measurement clarity, these reference lengths are common:
- 20ft (about 6.1 m)
- 40ft (about 12.2 m)
- 45ft (about 13.7 m)
20ft decks: tight sites and compact project cycles
Short decks reduce turning stress in tight industrial yards. Positioning is often quicker. Compact machinery can create higher point loads, so reinforcement becomes more important than length.
This size often pairs well with frequent side loading. Dense anchor spacing also helps because compact cargo can be awkward to restrain.
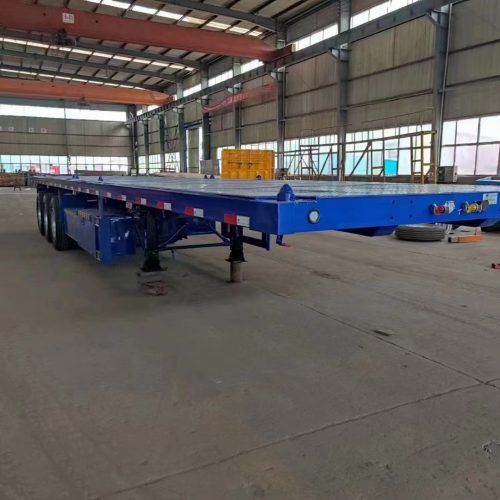
Compact platforms work well on tight sites and short dense loads.
40ft decks: the baseline for mixed industrial freight
A 40ft deck often supports repeatable loading plans. Pallets, pipe, beams, and general industrial cargo can be handled without constant exceptions. Tie-down kits and loading patterns stay consistent.
Container work can overlap with this length class. When ISO containers appear frequently, twist locks become valuable. When container moves are rare, twist locks may not justify the added complexity.
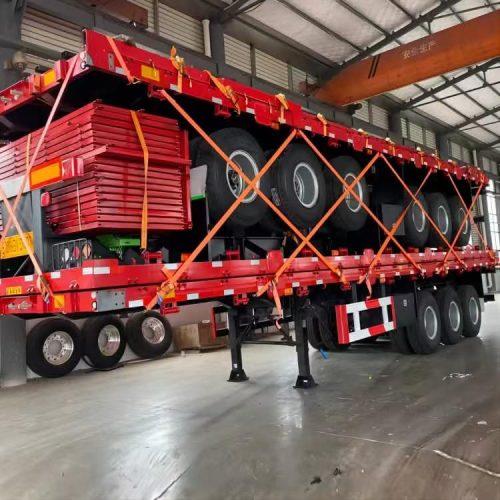
40ft decks often become the “default rhythm” for mixed work.
45ft decks: fewer trips for long light cargo, with higher structural demand
Longer decks can reduce trip count for long materials. That benefit is real in the right cycle. Longer spans also amplify design weaknesses at weld transitions and hanger zones.
Beam geometry and crossmember design deserve extra attention in this size. Quality issues become visible sooner when bending forces increase.
Extendable decks: the flexible tool for variable project cargo
Project cargo often changes length by phase. An extendable deck can serve multiple phases without switching equipment. The locking mechanism is the heart of the design, so rails, wear pads, and locking pins should be specified clearly.
For structure context and typical use cases, this product page provides a clear overview: extendable platform trailer design overview and use cases.
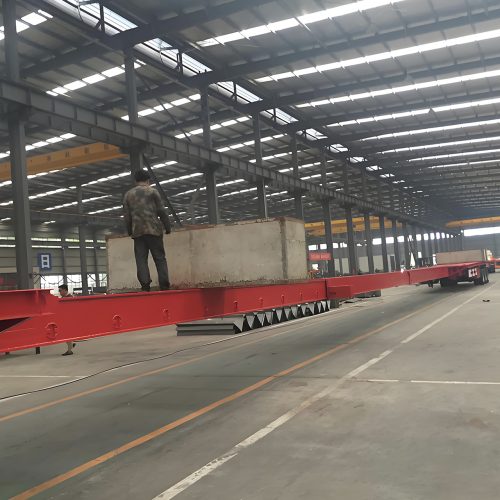
Extendable decks support variable cargo length without constant equipment swaps.
Step 4: Twist locks — when they add value and when they do not
Twist locks add value when ISO containers appear regularly. They also help when container moves are urgent and a dedicated chassis is not available. In mixed fleets, a platform with locks can reduce equipment variety.
Twist locks may not add value when container moves are rare. In that case, the mounts become unused weight and extra maintenance. The decision should follow frequency and handling tools.
Reach stackers and top loaders prefer predictable corner access. Placement and clearance matter. Mount strength matters as well, especially if operations include yard impacts.
For more detail on platforms designed around container use, these internal pages are useful:
- shipping container platform trailer overview and use cases
- container skeleton trailer design and twist lock safety logic
Step 5: A quick axle-load “sanity check” method (simple and practical)
Legal limits vary, so method matters more than numbers. A quick sanity check can reveal whether a configuration is likely to struggle under real conditions.
Scale tickets are a strong baseline. Start with a known combination and record steer axle, drive group, and trailer group weights under a typical load. That baseline shows how the system behaves in practice.
Weight distribution behaves like a lever. Moving cargo forward increases kingpin load and often reduces trailer axle group load. Moving cargo rearward does the opposite. Kingpin setting and axle spacing influence how strongly those changes appear.
A practical requirement for an order is simple:
- Require a load distribution diagram showing kingpin vs axle group weights at multiple cargo positions.
- Require the assumptions behind the diagram: cargo weight, cargo length, cargo center of gravity range.
- Require the allowed cargo position window that keeps axle weights stable.
A useful spec line avoids legal numbers while still forcing real work:
- “Supplier provides axle-load distribution calculation for typical cargo weights and cargo position range; diagram included in delivery pack.”
This document often prevents the “strong frame, constant fines” problem.
Step 6: Braking and heat management for long grades (more detail, less theory)
Heat appears as real symptoms: brake fade, drum cracking, hot hubs, and faster tire wear. These symptoms often appear in mountainous routes, heavy density cargo, and stop-start corridors.
Drum brakes are widely serviceable and fit many duty cycles well. Disc brakes offer consistent performance and different heat behavior. The decision is rarely about which is “better.” The decision is about route style, service environment, and risk tolerance.
A spec can focus on system requirements:
- brake chamber size and slack adjuster standard
- ABS/EBS requirement where policy or route demands it
- hose routing rules near hot zones
- abrasion sleeves and defined clamp spacing rules
- service access for routine inspection
Small routing details can prevent large failures. Air hoses should not touch edges. Harness lines should not hang. Protective sleeves should exist at rub points. These are easy to inspect, so they belong in acceptance criteria.
Step 7: Wheel-end durability (oil vs grease, seals, and endplay)
Wheel-end issues are usually expensive because downtime adds cost quickly. Seal failure can lead to leaks, contamination, heat rise, and bearing damage.
Lubrication choice influences service habits:
- Oil-lubricated hubs allow visual checks for leaks and oil condition.
- Grease-lubricated hubs can fit simpler service environments, yet rely on correct packing discipline.
Seal quality and installation matter either way. Spindle surface condition matters. Endplay checks matter too. Incorrect endplay can overheat bearings and shorten service life.
Clear spec wording avoids vague promises:
- “Wheel-end lubrication method specified (oil or grease), seal type specified, and endplay verification included in delivery inspection.”
Step 8: Securement language that stays consistent (WLL, LC, and anchor ratings)
Securement becomes confusing when terms mix. Straps are often described by LC (Lashing Capacity). Chains are often described by WLL (Working Load Limit). A practical approach is consistency.
Terminology note: tie-down ratings should follow the compliance framework used in your operating region.
• North America / FMCSA-style practice: specify and verify WLL (for webbing straps, chains, wire rope, etc.), and ensure the aggregate WLL meets your securement plan.
• Europe / EN-style practice: straps are commonly specified by LC (and sometimes STF), and markings should match the adopted securing method.
Always align the RFQ and labels with the regulations and standards applicable to your fleet.
Anchor points are the foundation. Strong straps do not help when hook points are weak or poorly reinforced. Anchor ratings should be stated as rated capacity per point. Layout drawings should show spacing and accessible geometry.
A spec line that stays readable:
- “All tie-down points rated to ______; anchor layout drawing approved; reinforcements defined by thickness and weld pattern.”
Step 9: Cargo matching without heavy tables (mobile-friendly reference)
The goal is quick matching: deck surface behavior, securement focus, and a short spec note.
Steel coils
- Deck focus: reinforced zones and anti-roll control
- Securement focus: chains + rated rings, clean pull angles
- Spec note: coil cradle/rack and wear protection under contact points
Steel beams and profiles
- Deck focus: abrasion resistance and stable crossmember support
- Securement focus: stake pockets + rub rails + edge protection
- Spec note: pocket spacing and strap-friendly rub rail edges
Pipes
- Deck focus: grip and rolling resistance
- Securement focus: stakes and strap geometry, anti-slip mats
- Spec note: chock blocks and stake compatibility
Timber and long materials
- Deck focus: high grip and repairable surface
- Securement focus: strap-friendly rub rails and stake spacing
- Spec note: bunks and strap protection at corners
Pallet freight under forklifts
- Deck focus: forklift wear zones and traction
- Securement focus: lashing rings + rub rails for flexible angles
- Spec note: wear strips and anchor access from both sides
Machinery (wheeled or tracked)
- Deck focus: point-load reinforcement and wear plates
- Securement focus: chains + binders + rated anchor geometry
- Spec note: ramp angle and track contact plates where required
ISO containers (20ft/40ft patterns)
- Deck focus: corner access and durable lock mounts
- Securement focus: twist locks and corner clearance
- Spec note: lock count, spacing, and inspection access
Mixed project cargo
- Deck focus: mixed zones and high anchor density
- Securement focus: flexible anchor geometry and rated points
- Spec note: anchor layout drawing required before production
Step 10: Spec Sheet template (copy-ready, no unfinished placeholders)
A spec works only when it is unambiguous. The easiest way to avoid ambiguity is to name every critical field.
1) Dimensions and interface
- Clear usable deck length: ______ mm minimum
- Overall length and width: ______ mm × ______ mm (route-compliant)
- Deck height target (with tractor): ______ mm
- Neck/gooseneck geometry: compatible with tractor fifth wheel height ______ to ______
- Kingpin: 2″ or 3.5″, bolted type, brand ______
- Landing gear: rating ______T, reinforced mounting plates, safe crank access
- Accessories: toolbox quantity ______, mounting position ______, weather seal required
- Spare tire carrier: included / not included; access clearance stated
2) Frame and deck support
- Main beam steel grade: ______ (mill certificate required)
- Beam thickness (flange/web): upper ______ mm / web ______ mm / lower ______ mm
- Crossmember size and spacing: size ______; spacing ______ mm maximum
- Reinforced zones: kingpin area, hanger zones, rear frame, point-load areas (list thickness)
- Deck surface: hardwood / checkered plate / mixed zones; thickness ______
- Rub rails and pockets: rub rails yes/no; stake pockets spacing ______; rope hooks spacing ______
- Anchor points: rated tie-down points ______; layout drawing required
3) Running gear
- Axle plan: 2 / 3 / 4 axles; rating ______T each; hub standard ______
- Suspension: mechanical / air; bushing spec stated; service access stated
- Tires: size ______; load index ______; heat suitability for route confirmed
- Brakes: chamber spec stated; slack adjuster standard stated; ABS/EBS yes/no
- Air system routing: abrasion guards at rub points; clamp spacing stated
- Electrical harness: sealed connectors; protected routing; clip spacing stated
4) Coating and corrosion control
- Surface preparation: blasting standard stated; photo evidence required
- Paint system: primer + topcoat stated; thickness target ______ μm
- Water trap control: drainage and cavity control addressed
- Touch-up rules: delivery touch-ups documented and corrected
5) Documentation and acceptance
- Approved drawings: final drawings approved before production; as-built confirmation included
- PDI package: checklist with photos; dimensional report; torque marks for key fasteners
- Spare parts list: recommended spares for early operation included
If your fleet runs mixed cargo, keep a short “trailer type vs cargo” appendix so dispatch and procurement use the same terminology.
Step 11: Supplier questions that reveal quality quickly
Some questions force concrete answers. Concrete answers support production control and acceptance control.
Structure and welding
- Which steel grades are used for main beam, side rails, and crossmembers?
- Are mill certificates provided for the main beam steel?
- Which zones receive reinforcement plates, and what thickness is used?
- What is the crossmember spacing, and is it uniform across the deck?
- Which joints are inspected, and what evidence is provided (photos, reports)?
- How are weld toes handled at stress transitions near hangers and kingpin areas?
Running gear and alignment
- What is axle rating per axle and the hub standard?
- Which seals and bearings are used, and are spares widely available?
- Is axle alignment verified at delivery, and is a report included?
- Which bushing material is used, and what hardness range applies?
- Which tire load index is included, and what heat behavior is expected on grades?
Brakes, air, and electrical
- Which brake chamber and slack adjuster standards are installed?
- Is ABS/EBS included when policy or route conditions require it?
- How are air lines protected from abrasion and heat?
- Are electrical connectors sealed and supported with clips at defined spacing?
Coating and corrosion control
- What surface preparation is used and what standard is targeted?
- What paint system is applied and what thickness target is measured?
- Which zones get extra coating attention (edges, seams, underside)?
- How are drainage and water traps prevented around structure cavities?
Delivery evidence
- Is an as-built confirmation provided against the approved drawing?
- Is a photo pack provided for critical zones (hangers, kingpin, wiring, coating)?
- Is a fastener torque marking policy used and documented?
- Is a spare parts recommendation included for early operations?
Step 12: PDI checklist for delivery day (yard-friendly)
A PDI works best when it targets real failure modes: rub points, loose clamps, missing guards, and small misalignments.
A) Identity and dimensions
- ⬜ Chassis number and documents match
- ⬜ Overall length, width, deck height match approved drawing
- ⬜ Kingpin size and height match tractor interface
- ⬜ Landing gear runs smoothly under load and retracts fully
- ⬜ Accessories match positions and mounting quality
B) Frame, deck, and anchors
- ⬜ Main beams straight with no visible twist
- ⬜ Crossmembers consistent; deck surface sits evenly
- ⬜ Reinforcement present at hanger zones and kingpin zone
- ⬜ Rub rails and pockets align with the approved layout
- ⬜ Tie-down points show reinforcement; no sharp edges at anchor zones
C) Welding and stress transitions
- ⬜ Welds consistent at hangers, rear frame, and neck structure
- ⬜ No visible undercut or porosity clusters in critical zones
- ⬜ Stress transition zones show smooth finishing where required
- ⬜ Drainage features present; no obvious water traps
D) Wheel ends, axles, suspension, tires
- ⬜ Axle count and ratings match the order sheet
- ⬜ Hubs and seals match the stated standard
- ⬜ Endplay check performed and documented
- ⬜ Tire size and load index match spec; no sidewall damage
- ⬜ Wheel nuts torqued and marked; rims match standard
E) Brakes and heat-risk routing
- ⬜ Air lines routed with guards at rub points and edges
- ⬜ Clamp spacing consistent; no hanging hose loops
- ⬜ Brake chambers and slack adjusters match spec
- ⬜ Static leak check passes; pressure holds over set time
- ⬜ Hoses kept away from heat zones; sleeves used where needed
F) Electrical and lighting
- ⬜ All lights function (tail, brake, turn, markers)
- ⬜ Harness clips present; no loose hanging sections
- ⬜ Sealed connectors present; no exposed copper
- ⬜ Loom protection exists at contact points and edges
G) Coating and corrosion
- ⬜ Coating coverage complete at seams, edges, underside
- ⬜ No bare steel visible; no blistering or flaking
- ⬜ Touch-up areas documented with photos and corrected
- ⬜ Underbody coating consistent in high splash zones
H) Options
- ⬜ Twist locks rotate smoothly and lock firmly (if equipped)
- ⬜ Ramps fit and pin securely (if included)
- ⬜ Toolbox hinges and seals work; locking hardware installed
- ⬜ Spare tire carrier access is safe and unobstructed
For budgeting, compare options using the same LCC buckets (tires, brakes, wheel ends, corrosion, downtime) so “cheaper” and “stable” are measured on the same sheet.
Step 13: Human factors that quietly decide productivity
A platform can be strong and still frustrate daily work. The frustration usually comes from reach, access, and interference. These are not luxury details. They are productivity details.
Tie-down points should be reachable without climbing onto unstable cargo. Toolboxes should open fully without hitting the load or blocking straps. Landing gear crank access should remain usable when the yard is crowded. Spare tire access should not require unsafe body positions.
A simple “reach and access” list can be added to the spec review:
- tie-down points reachable from both sides
- anchors not hidden behind brackets or rub rails
- toolbox doors clear typical cargo overhang zones
- landing gear handle clears common obstacles
- step plates and anti-slip surfaces exist where people stand
These details lower day-to-day friction. They also lower mistakes during loading.
Step 14: 30-day recheck routine (because some problems show late)
Some issues appear only after vibration, settling, and real loading cycles. A 30-day recheck often prevents small looseness from becoming failure.
30-day recheck items
- ⬜ Re-torque wheel nuts and remark
- ⬜ Check axle alignment and tire wear pattern
- ⬜ Inspect suspension bushings and U-bolts for settling
- ⬜ Inspect air lines and harness routing for new rub marks
- ⬜ Verify brake adjustment behavior and air leak status
- ⬜ Check twist lock rotation and lubrication (if equipped)
- ⬜ Inspect coating at impact points and touch-up early chips
This routine is simple. It often saves time later.
Step 15: Lifecycle cost (LCC) — a practical comparison method
Purchase price is easy to see. Cost per kilometer is what decides long-term value. Tires, brakes, wheel ends, corrosion repairs, and downtime often dominate.
A simple method keeps comparisons honest:
LCC = Purchase + Wear Parts + Corrosion Control + Downtime Impact
Break wear parts into five buckets
- Tires: sets per year, alignment frequency, heat-related failures
- Brakes: lining/drum cycles, labor hours per cycle, grade heat risk
- Suspension wear: bushings, U-bolts, equalizers, spring seats
- Wheel ends: seals, bearings, oil/grease service cycles, hub checks
- Small failures: hoses, fittings, harness clips, lamps, valves
Downtime deserves its own line because it compounds. One unplanned stop can cost more than routine service.
A simple estimator table can be used internally:
- tire set cost × sets per year
- brake service cost × frequency
- seal and bearing service cost × frequency
- coating touch-up cost × frequency
- downtime day value × days per year
This breakdown also helps define service targets in the spec. Strong service targets reduce long-term surprises.
Putting it all together: a practical workflow that stays consistent
A good platform trailer stays boring in daily use. Coupling is easy. Loading is fast. Restraint is consistent. Maintenance is predictable. That “boring” outcome comes from clarity.
A clean workflow is straightforward:
- use the Cargo & Route Brief to lock duty cycle assumptions
- prevent the top-10 mistakes with measurable spec lines
- use supplier questions to force evidence, not promises
- run PDI on delivery day with photos and pass/fail criteria
- run a 30-day recheck to catch settling and rub points early
- compare options using LCC buckets, not purchase price alone
This workflow supports heavy duty hauling, general cargo logistics, project cargo transport, and mixed industrial operations.
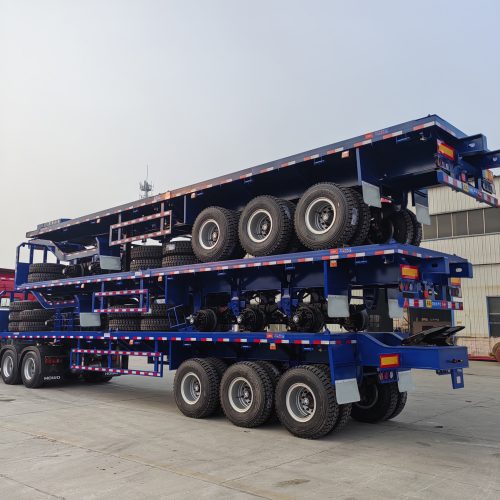
Tri-axle configurations often balance distribution, stability, and service access.
Summary and three practical actions
A strong open-deck trailer is not just steel and axles. It is a system that supports loading speed, safe restraint, predictable weight distribution, and repeatable maintenance. When the work is documented and the spec is auditable, mistakes become rare.
- Write the Cargo & Route Brief and use it as the decision anchor.
- Attach the spec template fields so critical details stay measurable.
- Run PDI plus a 30-day recheck to catch routing and settling issues early.
If this is the workflow, a flatbed semi trailer becomes a predictable tool instead of a constant exception.